Get started with Billr
Getting started with Billr takes a few minutes. Create your Billr account, add your business details once, and you are ready to track time and send your first invoice.
Updated

Create your Billr account
Install Billr on your iPhone or Android phone, or open the web app at https://app.billr.cloud.
- Choose Get Started.
- Pick how you want to sign up: Sign Up with Email, Sign Up with Google, Sign Up with Apple or Sign Up with Microsoft.
- With email, fill in your name, your company name and your country, then choose Create Account. Billr sends you a confirmation email; confirm your address before you sign in. Nothing arrived? Choose Resend confirmation email.
With Google, Apple or Microsoft you go straight into the app. Your business details then come next, in the step below.
Fill in your business details
Billr prints your business details on every invoice and quote, so fill them in once before you send anything.
- Go to Settings and choose Business details.
- Choose Add Logo to put your logo on your invoices.
- Fill in your Business Name, your address and your contact details. Add a Business registration number if you have one.
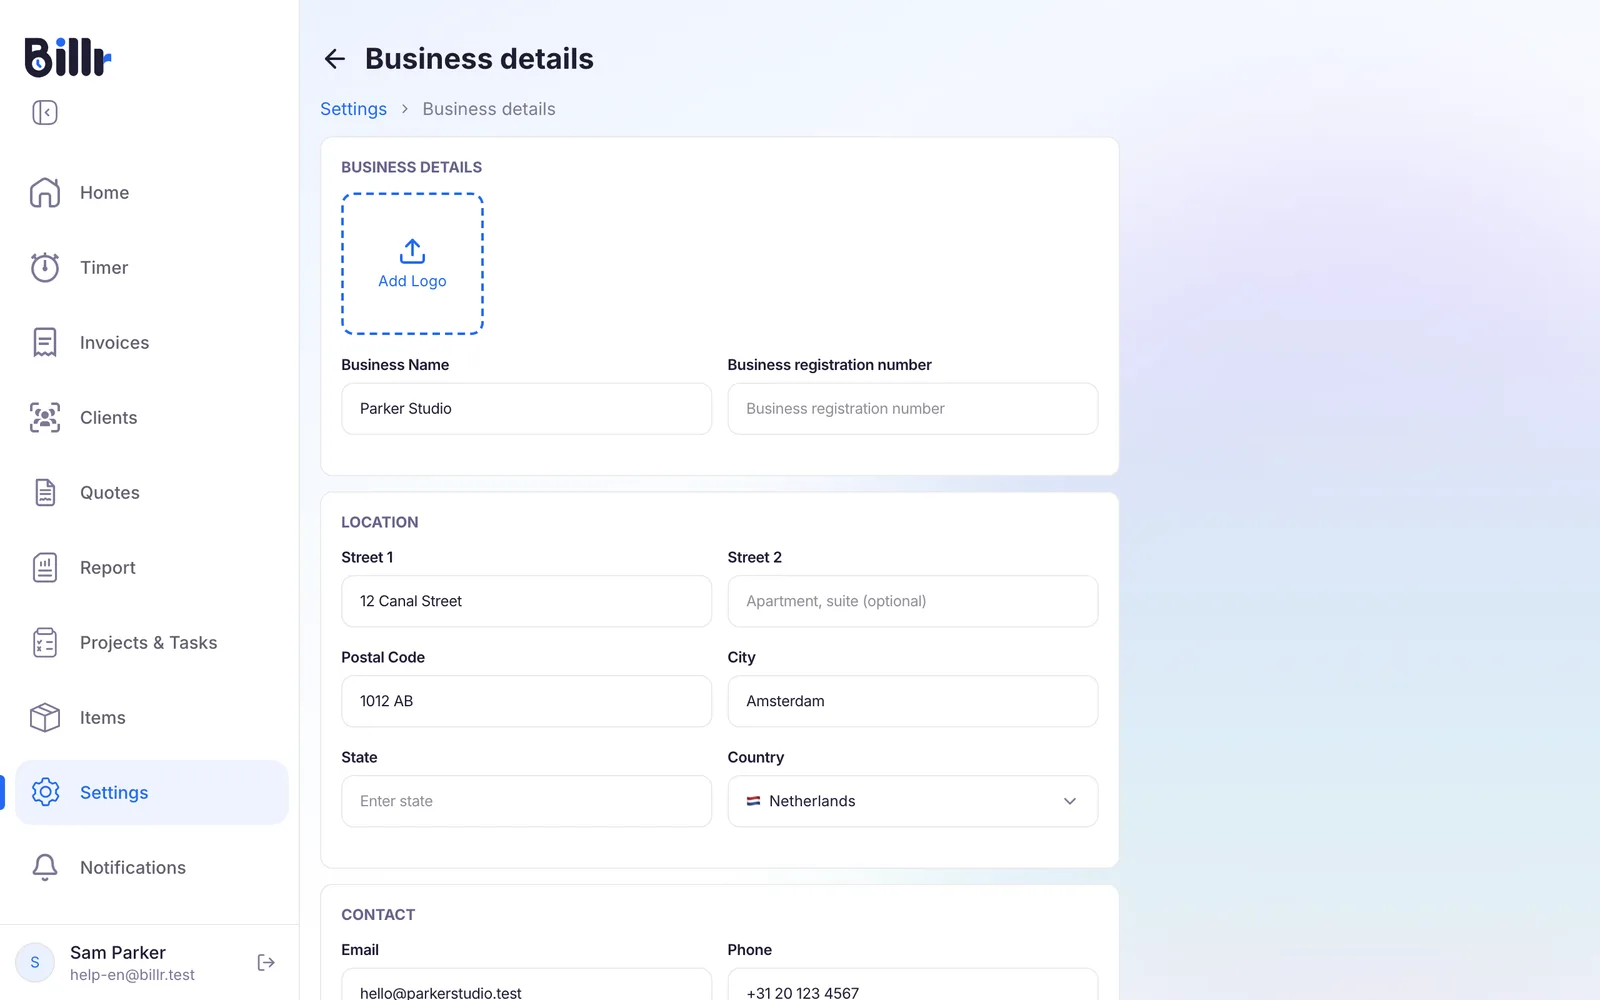
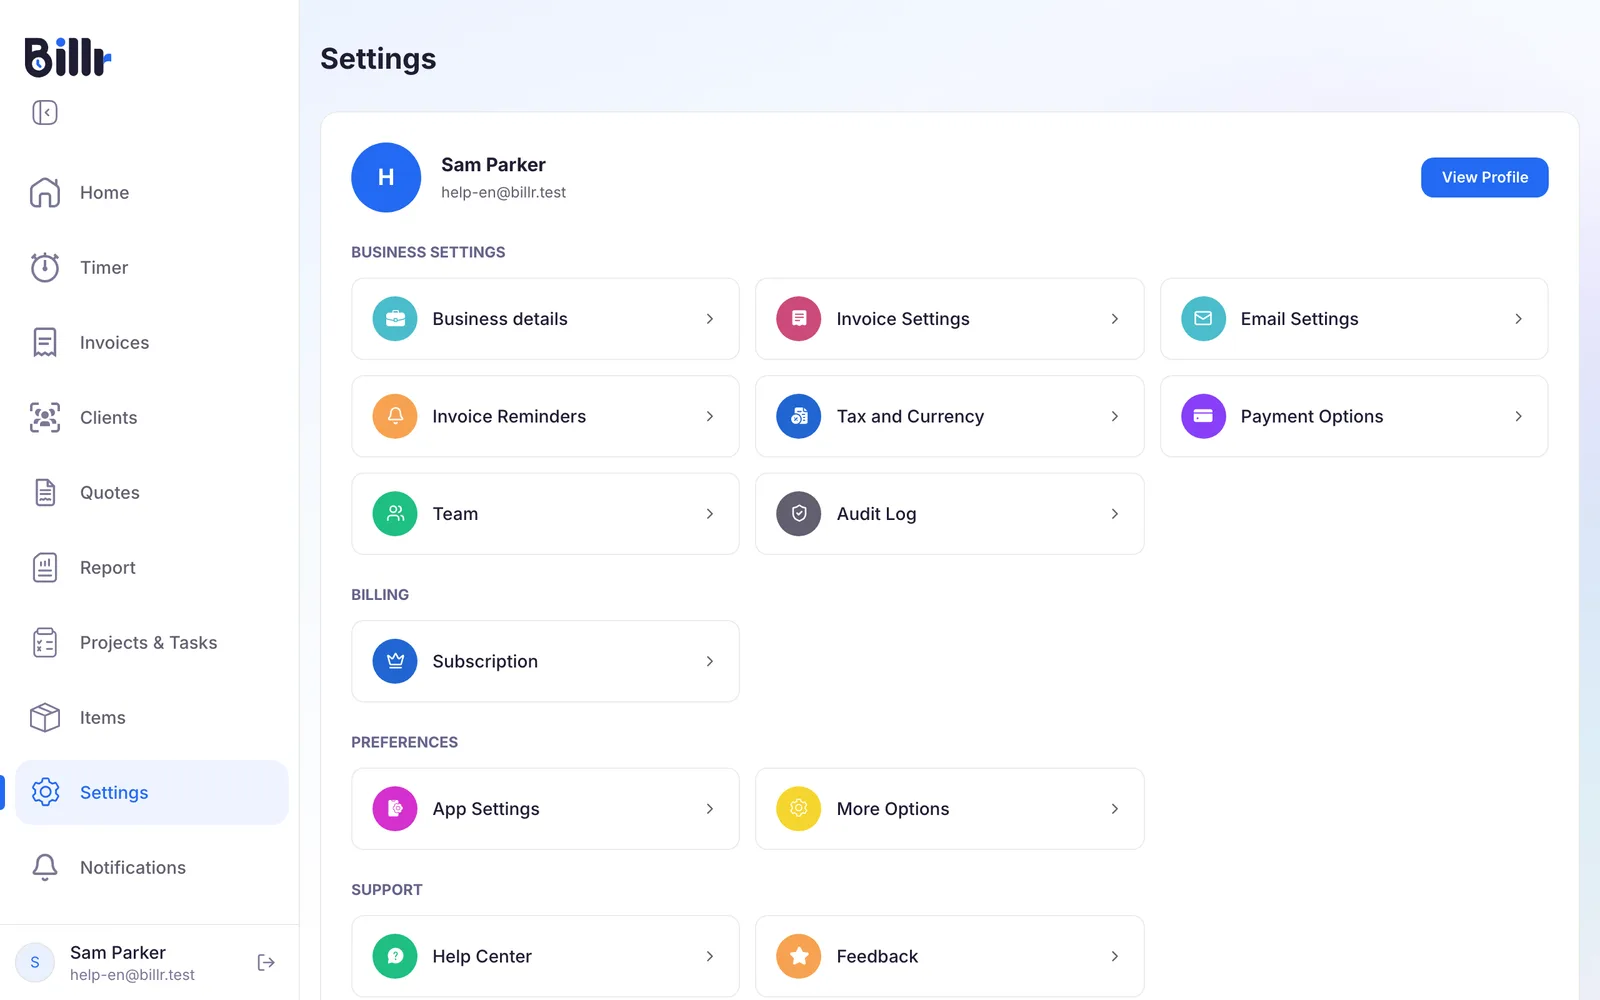
Your tax rate and your currency live under Tax and Currency, and the look of the PDF under Invoice Settings. Both are explained in Invoice layout, tax and currency.
Find your way around
Home is where you start. At the top, Summary shows your Hours Tracked, what you Received and your Unpaid Invoices for the period you pick. Below it, Quick Actions start the three things you do most: Start Timer, New Invoice and Add Client.
The menu takes you to the rest of Billr:
| Menu | What you do there |
|---|---|
| Timer | Track time and see your time entries. See Track time with the timer. |
| Invoices | Create, send and follow your invoices. |
| Clients | Keep the people and companies you work for. |
| Quotes | Propose work and let your client sign. |
| Report | See your revenue and the hours you worked. |
| Projects & Tasks | Group your work and plan the tasks in it. |
| Items | Save the services and products you invoice often. |
| Settings | Your business details, invoice layout, payments, team and plan. |
Send your first invoice
Your first invoice takes three steps.
- Add a client with Add Client. Only the name is required. More in Manage your clients.
- Choose New Invoice, pick the client and add your lines, or turn the time you tracked into lines.
- Choose Send Invoice. Billr emails the PDF to your client.
Every step, including the statuses an invoice goes through, is in Create and send invoices.
On the free plan you have 1 active project and 3 invoices and 3 quotes per calendar month. Clients, items, tasks and time tracking have no limit. When you reach a limit, Billr tells you which plan lifts it. The plans are compared in Plans and billing.
Frequently asked questions
What is Billr?
Billr is a time tracker and billing app for freelancers and small teams. You track hours with a timer, turn those hours into a quote or an invoice without retyping them, and let the client pay online by card or PayPal. It runs on iPhone, Android and the web app, works without a connection and syncs when you are back online. The app speaks 10 languages and supports 60 currencies.
How do I create an account?
Install Billr, tap Get Started and pick how you want to sign up.
Sign Up with Email asks for your name, company name and country, which Billr uses on your invoices. You confirm your address before you sign in, and the confirmation mail can be sent again from the login screen.
Google, Apple or Microsoft take you straight into the app. You add those business details afterwards under Settings, Business details.
Either way you can change all of it later.
How do I send my first invoice?
Your first invoice takes three steps.
Add a client under Clients, Add Client.
Choose New Invoice under Quick Actions on Home, or Create Invoice under Invoices, pick the client, and add your lines or pull in tracked time.
Tap Send Invoice.
Billr mails the PDF and keeps the invoice under Invoices, where its status shows Draft, Sent, Unpaid, Overdue or Paid.
What do I get on the free plan?
Free is one user, with these limits.
One active project.
Three invoices and three quotes per calendar month.
Clients, items, tasks and time tracking are not capped. Reports need Starter or higher, and inviting teammates needs Crew or higher. When you hit a limit the app says which plan lifts it.